by René Timmermans | Nov 11, 2017 | Photography
Click here to go directly to the photo gallery!
At the end of October I had the privilege to spend one week in Tokyo, the capital of Japan. What an amazing city and country! It is bursting with energy and activity during both day- and night time. It provides a mixture of atmospheres of the historic, ancient and traditional times and the modern, luxury, electronic- and gadget driven era we live in today. The food is healthy and outstanding and it’s people are friendly and extremely helpful and polite.
We arrived just before super-typhoon Lan, the second largest tropical cyclone on record, made landfall near the Tokyo area with ferocious winds and very heavy rainfall of more than 100mm a day. Luckily, shortly after Lan had moved on the weather turned for the better with blue skies, sunshine and comfortable temperatures.
With the digital version of the Lonely Planet Tokyo guide on my tablet, I started to explore the city, rapidly discovering that one week would be far too short. The Greater Tokyo Area is the most populous metropolitan area in the world with almost 38 million inhabitants in the Tokyo metro area and more than 13.5 million inhabitants in the Tokyo metropolis area. Where was I to start?
The underground system in Tokyo is working flawlessly with trains running very regular on the 13 subway lines covering the city. This enabled me to quickly transport myself to and from the interesting districts, not losing too much time in transport. During my short stay I managed to visit many districts. From our base in Akasaka I visited Tokyo Midtown, Roppongi, Asakusa, Sumida, Ginza, Tskuiji, Harajuku, Shinjuki and Shibuya.
The centrally located Akasaka is a residential and commercial area and is famous for the Hie Shrine, a Shinto Shrine dating from 1478. From Akasaka it is walking distance to Tokyo Midtown, with the tallest commercial buildings in the city, and the Roppongi district, well known for it’s sprawling night-life. In the northern located Asakusa district lies the Sensō-ji, an ancient Buddhist temple and Tokyo’s oldest and most significant temple. In neighbouring Sumida stands the Tokyo Skytree, a broadcasting, restaurant and observation tower. With its 634 meter it is the next tallest structure in the world.
Ginza is a popular upscale shopping area in Tokyo, with numerous internationally renowned department stores, boutiques, restaurants and coffeehouses. It is considered one of the most expensive, elegant and luxury streets in the world. Close by is the Tskuiji fish market, which is worth a visit during the early hours of a working day to have sushi for breakfast, as I did. Another popular shopping area is Harajuku, with Takeshita Street and Cat Street, and is considered the Japanese youth culture and fashion district.
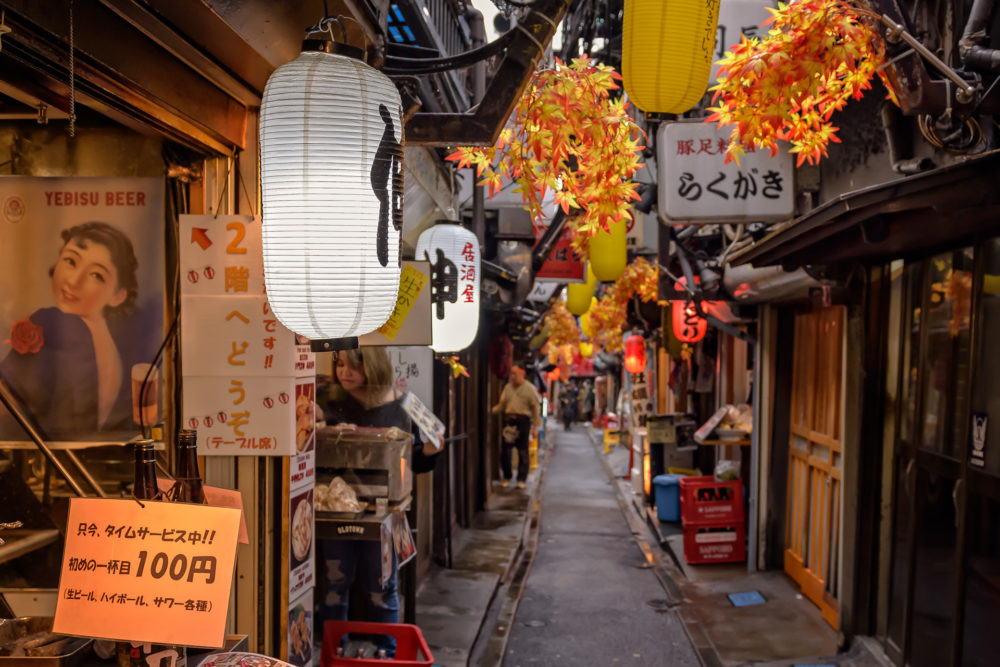
Shinjuku is a major commercial and administrative centre, housing the busiest railway station in the world (Shinjuku Station) which is crawling of people most of the day. Just north of Shinjuku Station you will find Piss Alley, a tight pedestrian street with many very small restaurants who can host only a few guests at a time. Although its name is not appealing, the food is fantastic! South of Shinjuku is Shibuya, another busy shopping and night-life district, and is most famous for the Shibuya Crossing. This large intersection stops all traffic to let pedestrians cross in any direction at the same time for approximately one minute. The Shibuya Crossing is often featured in movies, such as Lost In Translation and The Fast and the Furious: Tokyo Drift.
Enough with the words! A selection of 32 photos can temporarily be viewed on the Tokyo, Japan featured project page.
by René Timmermans | May 13, 2017 | Photography
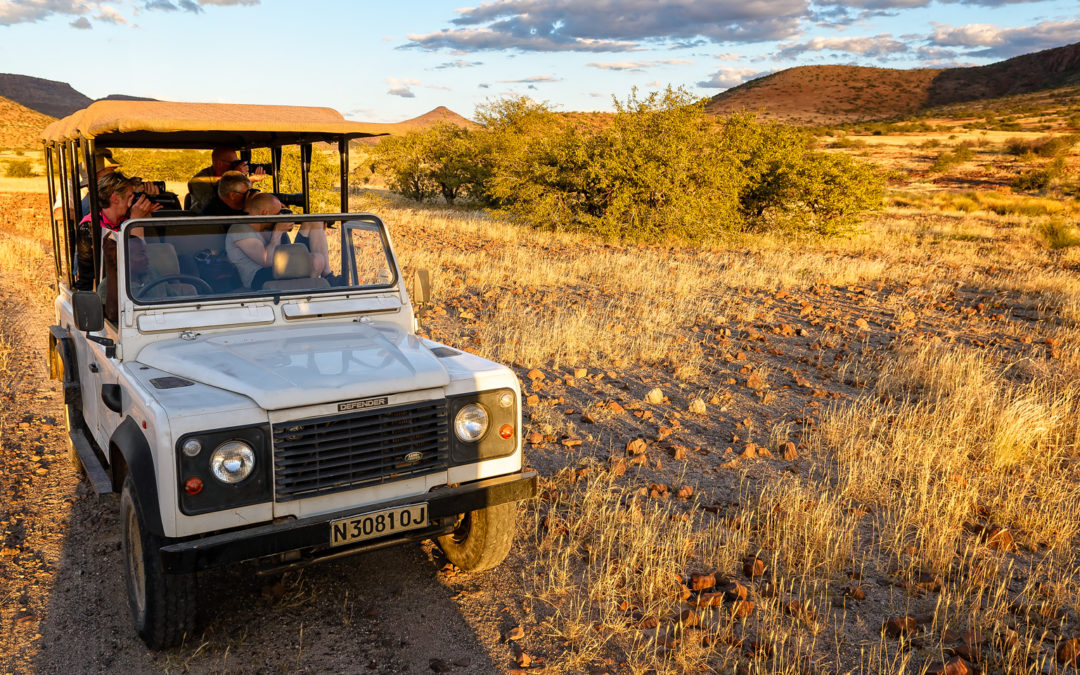
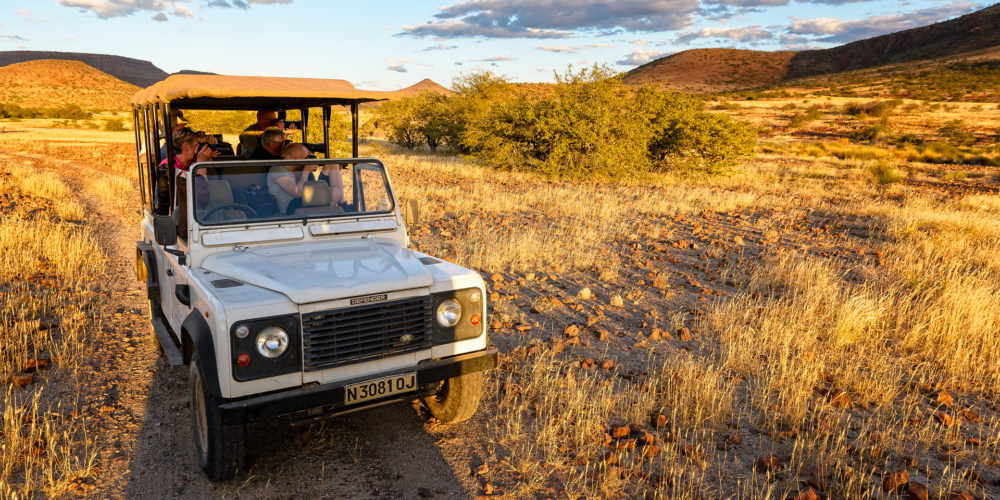
At the end of April I traveled for two weeks through Namibia in the southwest of Africa. This former German colony has a wide variety of wildlife and scenery to offer and some very unique landscapes. Namibia is twice the size of Sweden and slightly more than half of the size of Alaska. The country has only 2.5 million inhabitants, of which 325 thousand live in the capital Windhoek, in the center of the country.
The trip, specifically for photo-enthusiasts, was organized by Fotoresor i Fokus in cooperation with Aktiv Resor, a Stockholm based travel agency specialized in organizing active and adventurous holidays. Our tour guides, Elisabeth Landberger and Martin Agfors, are photo-professionals who offered a combination of energetic creativity and deep technological knowledge of anything photography.
The itinerary
From Windhoek we traveled north to the Etosha National Park, where we spent a few days spotting wildlife. From Etosha we traveled west to Damaraland and visited a Himba tribe village. We stayed in the Etendeka Mountain Camp, an eco-friendly luxury campsite that comes with the highest recommendations. It offers great home-made food and fantastic scenery all around.
From Damaraland we went onwards to the coast and visited the second largest city in the country, Swakopmund. This spacious and quiet city gives easy access to Walvis Bay, where tours for dolphin, seal and pelican spotting are organized.
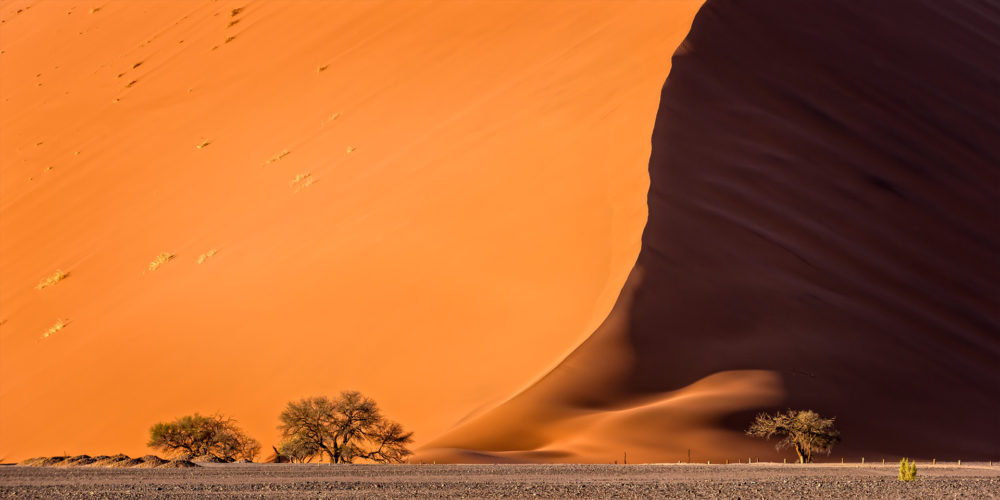
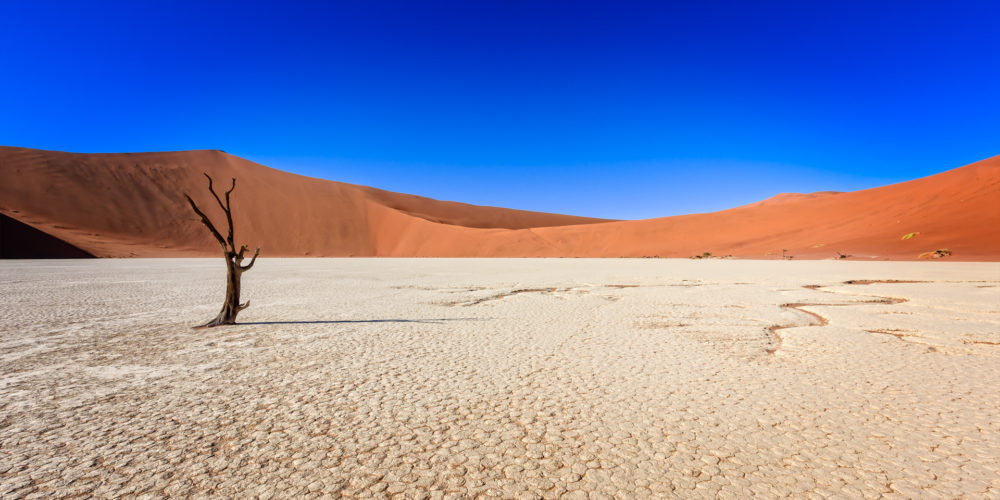
Our last stop before returning to Windhoek was, for me, the highlight of the journey, a visit to the south of the Namib Desert, Sossusvlei and Deadvlei. Both areas offer unique landscapes of endless sand dunes that reach a stunning 300-400 meters in height and clay pans with dead camel thorn trees (Vachellia Erioloba). A true photographers paradise!
A wider selection of my photos can temporarily be viewed on the Namibia featured project page. A smaller selection will eventually be published in the Gallery section.
by René Timmermans | Aug 7, 2016 | Gear
Recently I received the opportunity to review one of the Sleeklens products, the Through The Woods workflow for Adobe Lightroom. The workflow contains a bundle of 51 presets and 30 brushes targeted specifically for landscape photography. Besides the Through The Woods bundle Sleeklens provides many other bundles, e.g. for portrait, wedding and b&w photography. Check out their website for a full view of their offering.
Installation:
The bundle comes as a .zip-file. Once extracted it includes clear instructions how to install the presets and brushes into Adobe Lightroom, which is as easy as copying the files into the right folder. It also includes a useful document with recipes on example photos. Furthermore, on the Sleeklens website there are several easy-to-follow tutorial videos available on how to use the workflow.
Using the bundle:
The presets are very easy to use. In the Develop module in the Presets panel there is a list of 51 different presets divided over 6 categories. These presets can be used in combination of each other to create the desired effect. While hovering over one of the presets a preview of the preset is shown in the Navigator panel to get an idea of the effect before applying it. The brushes work equally as easy. When the Adjustment Brush has been selected all 30 brushes are available in the effect list and the effect can be painted into the photo.
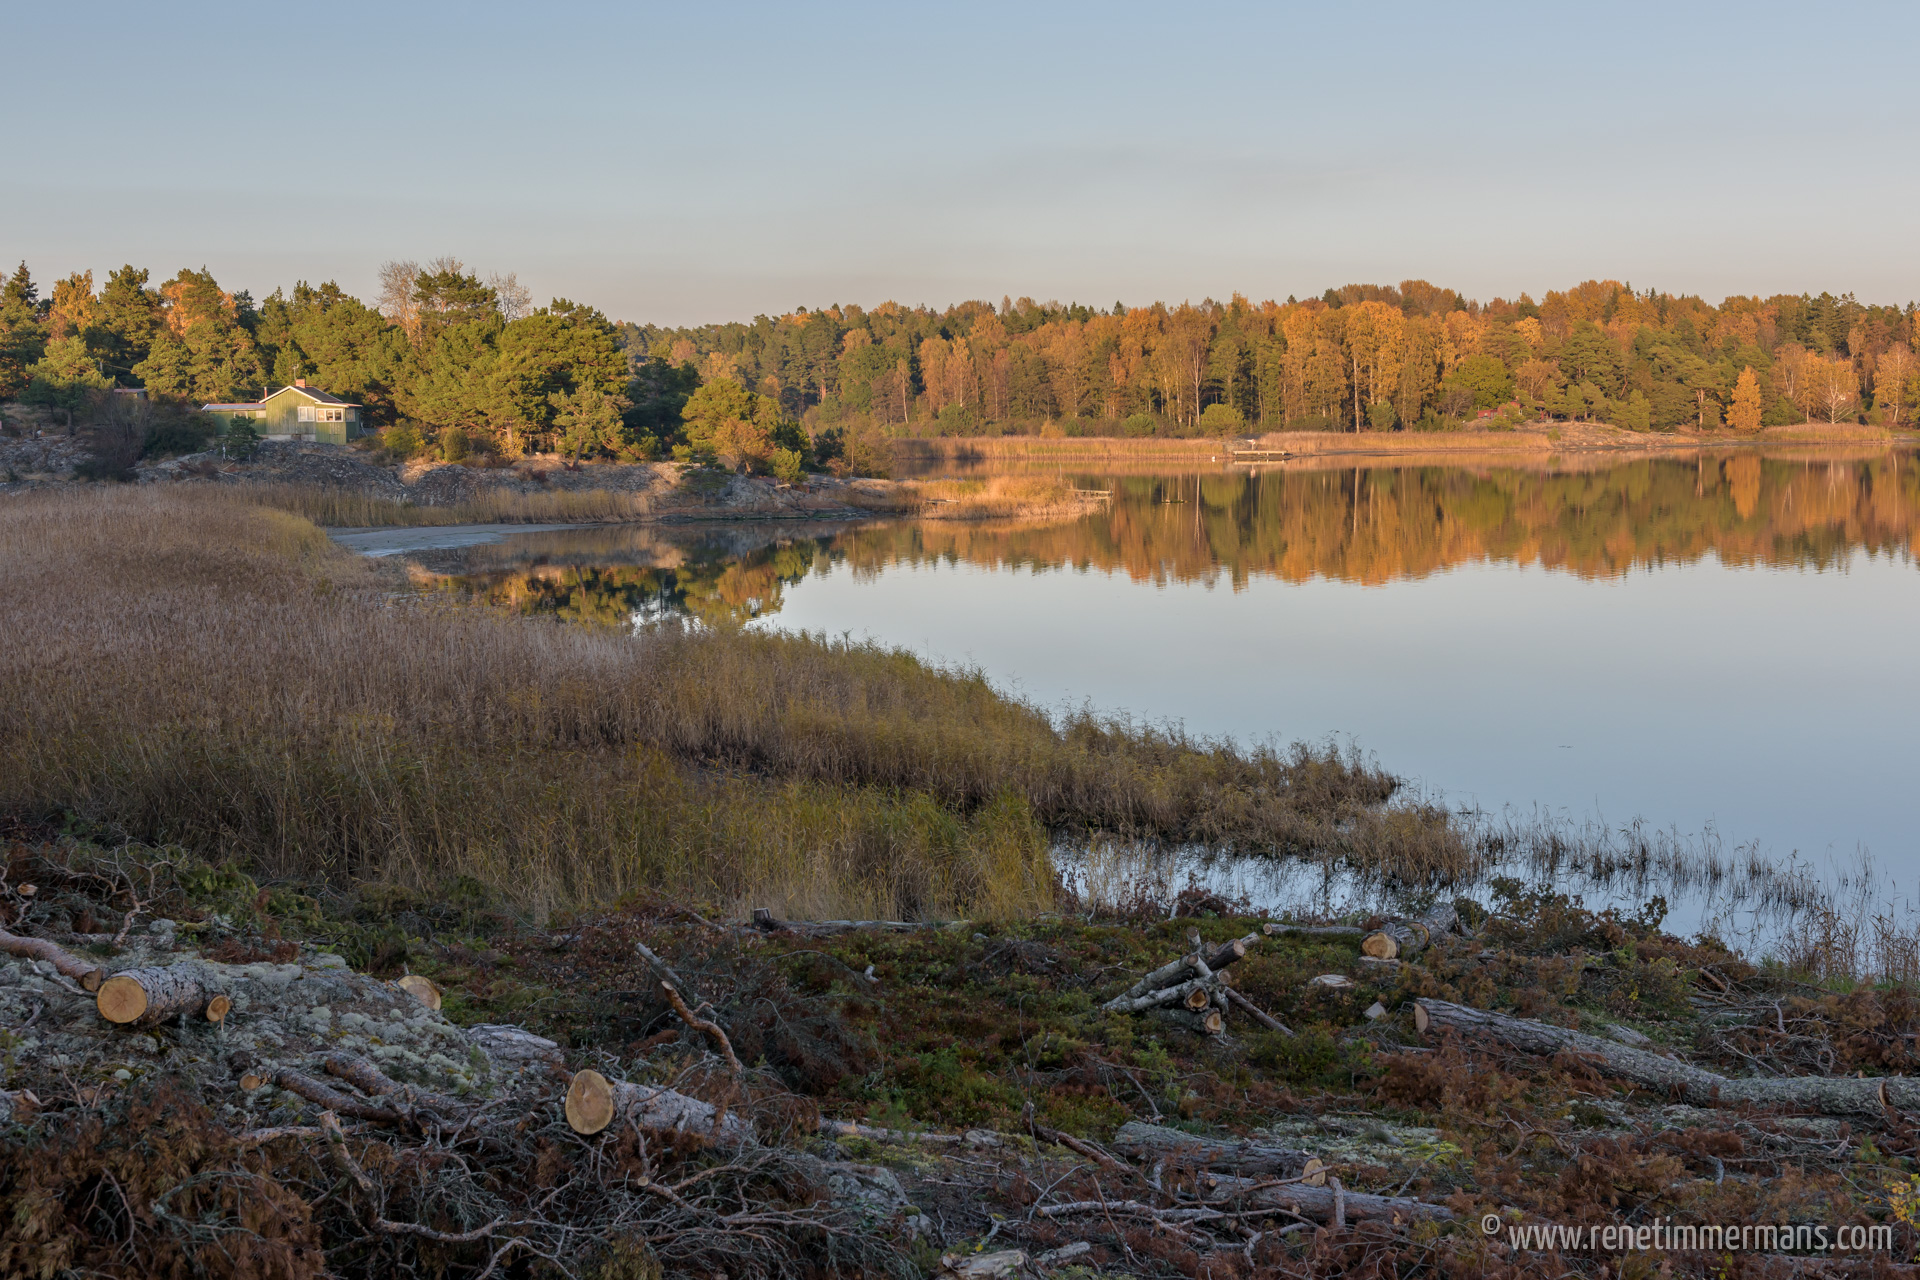
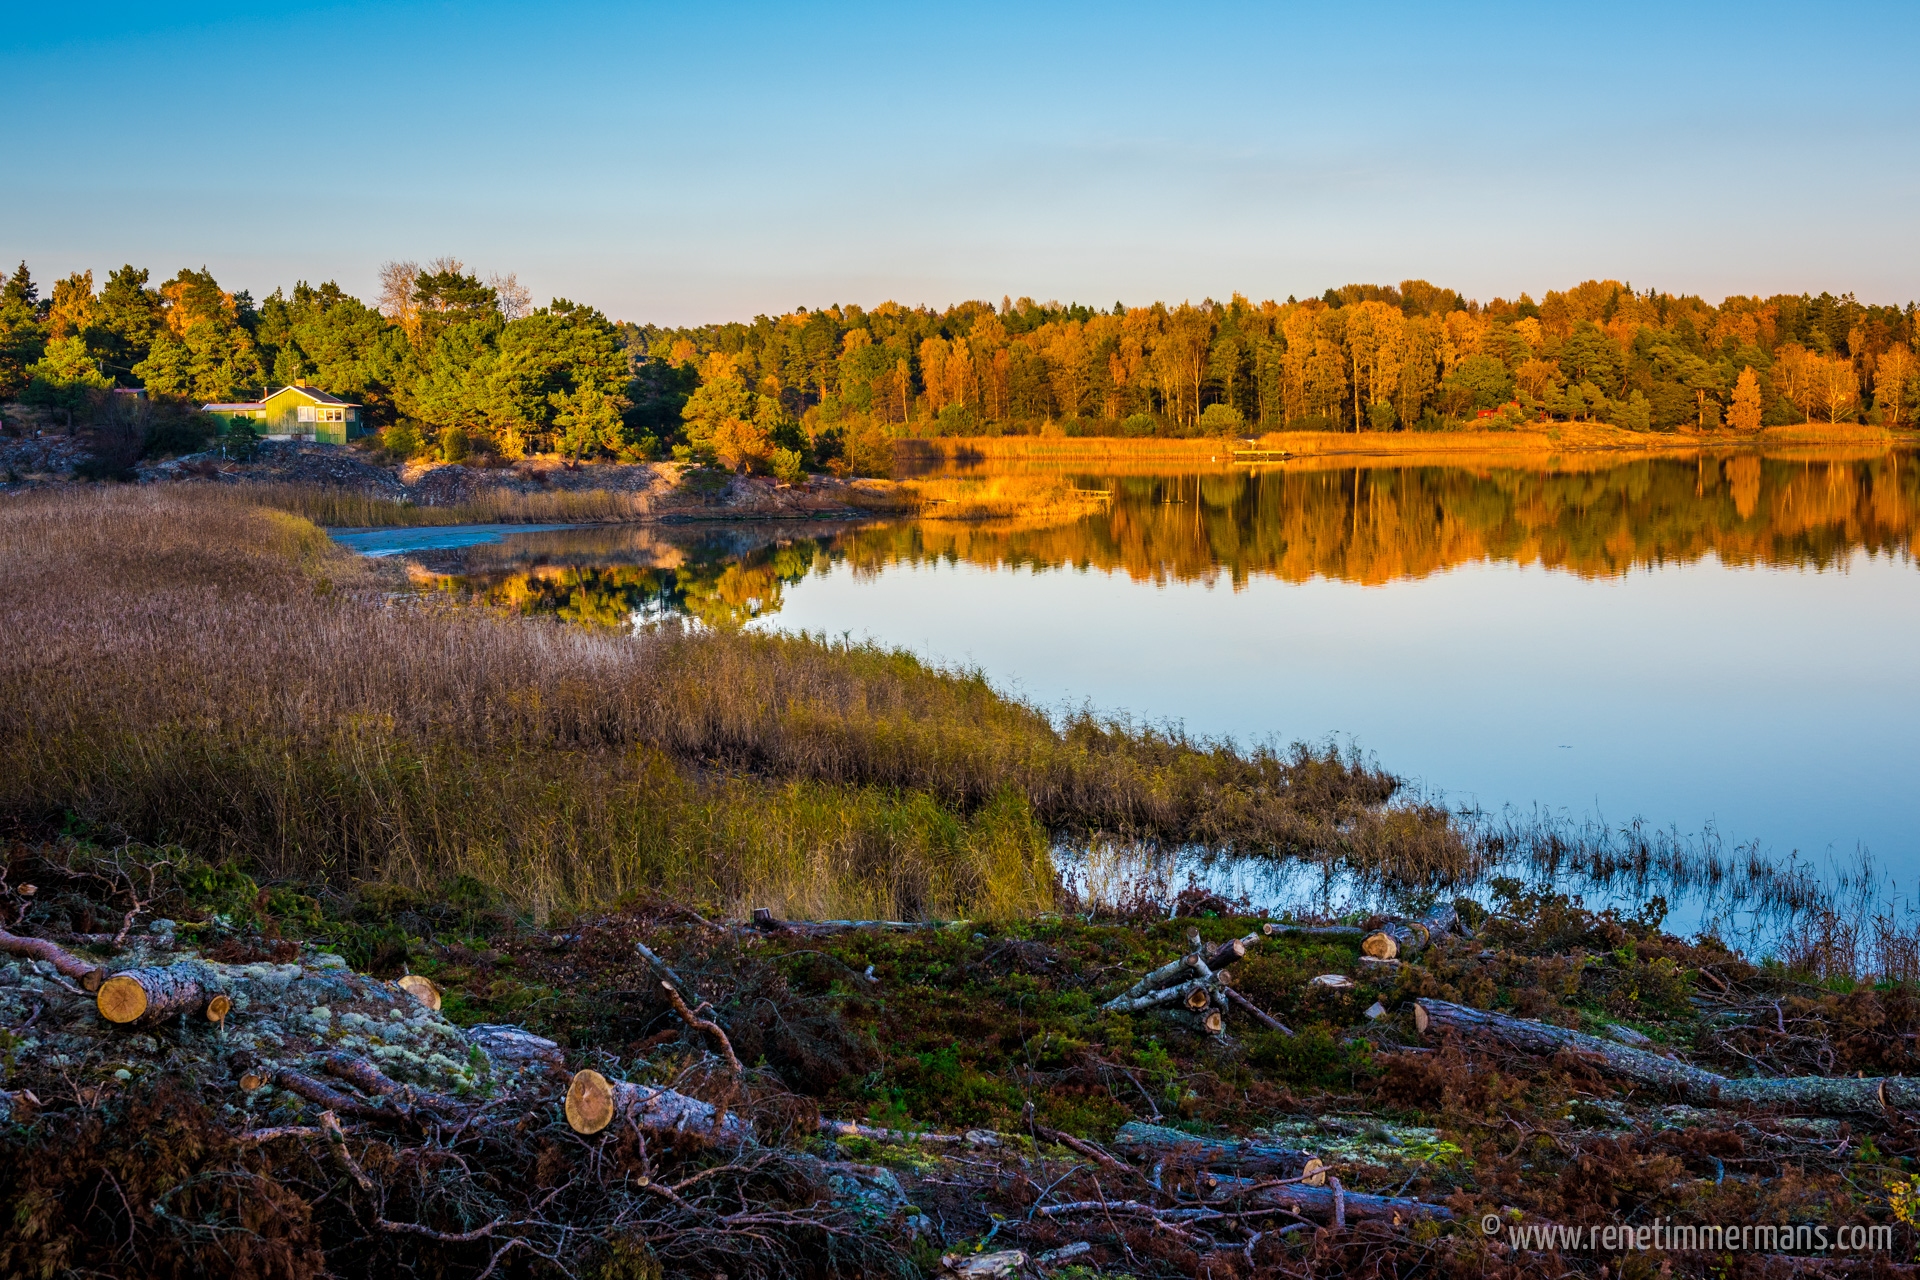
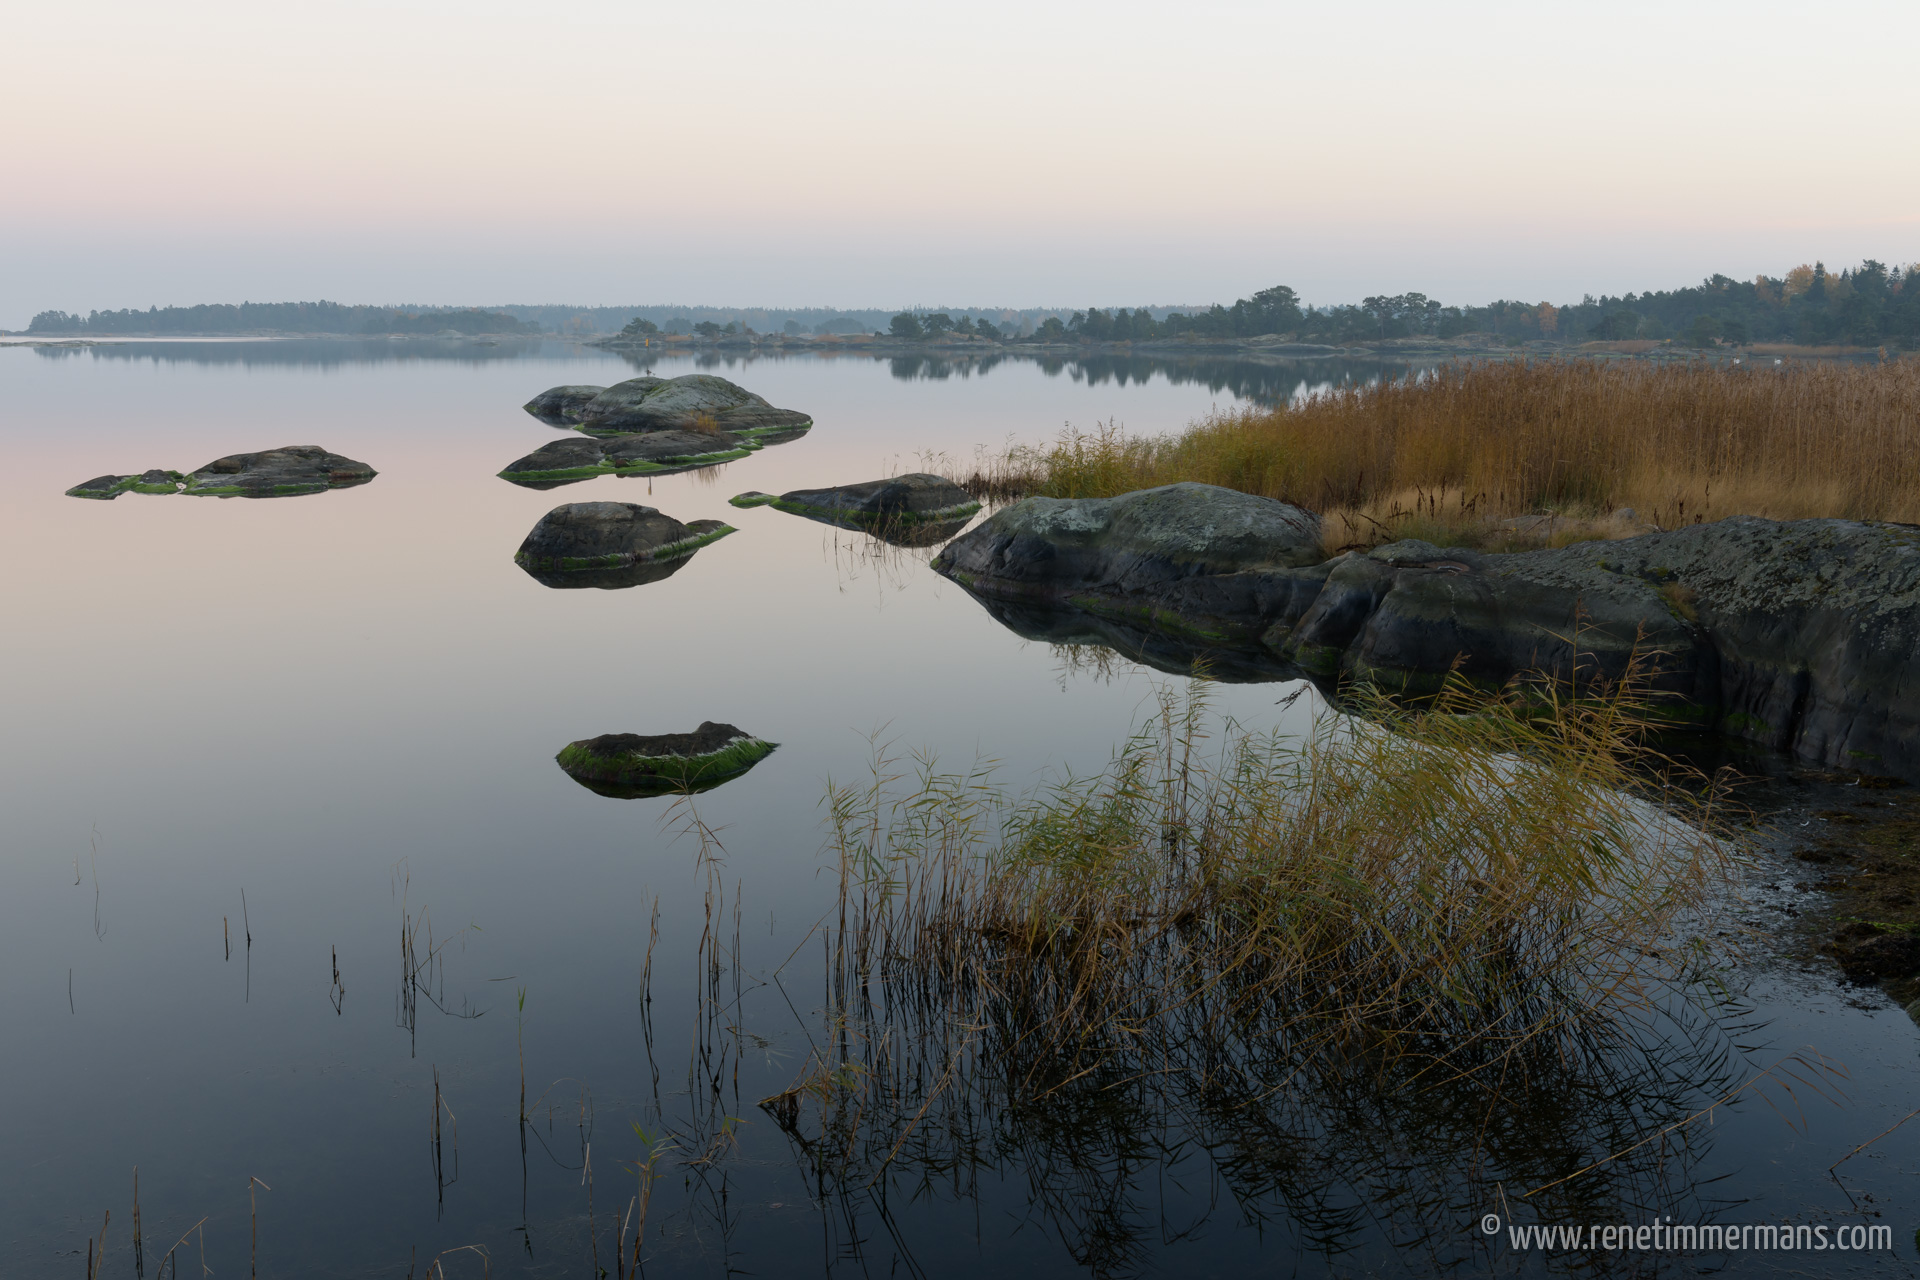
I have tested the presets and brushes on various photos. Below you will find two examples of edited photos with the Sleeklens bundle from a photo trip to the island of Utö in the Stockholm archipelago in October last year during the autumn. For both photos I have used a combination of all six Sleeklens preset categories and made local adjustments where necessary with the Sleeklens brushes. As you can see I was able to bring the photos to life by adjusting or enhancing the exposure, colors, contrast, etc without spending too much time in the Develop module.
Since each photo is unique in its own way it is difficult to get a desired effect by using standard presets or brushes. I found that tweaking of the develop settings is absolutely necessary after applying each preset or brush to get the optimal result. Nevertheless, the presets give me a quick starting base from where to adjust further on, without having to manually select and set all the different develop settings from the start. Especially when editing a large number of photos this will be saving a lot of time.
An additional advantage I found is that you do not need to leave Adobe Lightroom to apply the presets and brushes. I am used to work in my digital workflow with third-party plugins, e.g. OnOne Photo 10 or Google’s Nik Collection, but need to leave Adobe Lightroom to apply the effects, which takes time and creates multiple files in my database.
Example Photo 1: Autumn over Utö
Camera: Nikon D810
Lens: Nikon 24-70mm, f/2.8
Focal Length: 44mm
ISO: 200
Exposure: 1/200sec at f/8
Tripod: Manfrotto 190CXPRO3
Example Photo 2: Silent Autumn
Camera: Nikon D810
Lens: Nikon 24-70mm, f2.8
Focal Length: 38mm
ISO: 200
Exposure: 1/3sec at f16, -1EV
Tripod: Manfrotto 190CXPRO3
Conclusion:
The Sleeklens Landscape Lightroom Presets (Through The Woods) gives the ability to quickly apply standard develop settings to each photo saving time in the editing process and without having to leave Adobe Lightroom. The presets and brushes give a good starting point from where to tweak the develop settings further from.


Recent Comments