by René Timmermans | Nov 11, 2017 | Photography
Click here to go directly to the photo gallery!
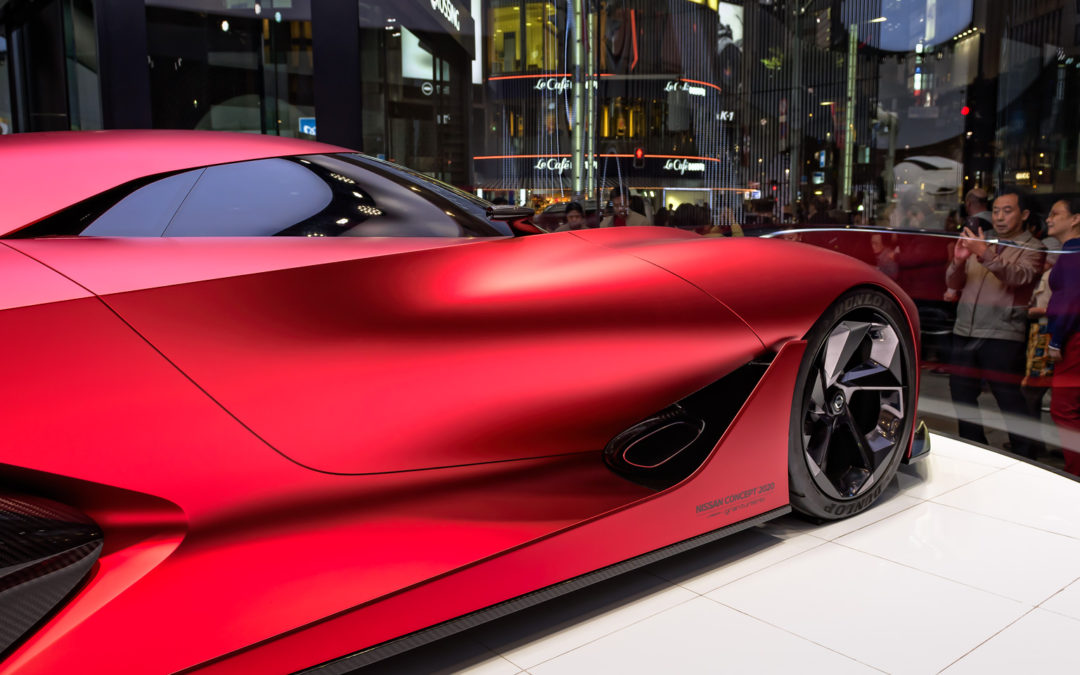
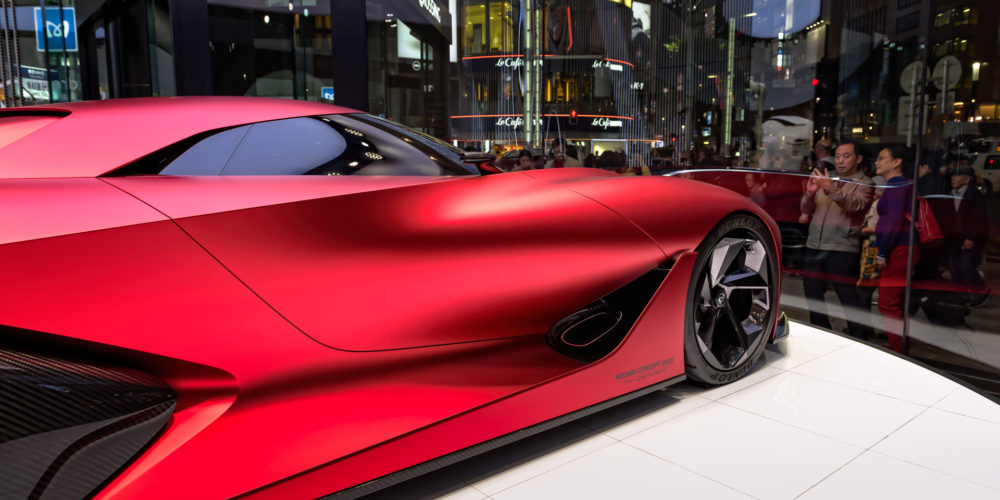
At the end of October I had the privilege to spend one week in Tokyo, the capital of Japan. What an amazing city and country! It is bursting with energy and activity during both day- and night time. It provides a mixture of atmospheres of the historic, ancient and traditional times and the modern, luxury, electronic- and gadget driven era we live in today. The food is healthy and outstanding and it’s people are friendly and extremely helpful and polite.
We arrived just before super-typhoon Lan, the second largest tropical cyclone on record, made landfall near the Tokyo area with ferocious winds and very heavy rainfall of more than 100mm a day. Luckily, shortly after Lan had moved on the weather turned for the better with blue skies, sunshine and comfortable temperatures.
With the digital version of the Lonely Planet Tokyo guide on my tablet, I started to explore the city, rapidly discovering that one week would be far too short. The Greater Tokyo Area is the most populous metropolitan area in the world with almost 38 million inhabitants in the Tokyo metro area and more than 13.5 million inhabitants in the Tokyo metropolis area. Where was I to start?
The underground system in Tokyo is working flawlessly with trains running very regular on the 13 subway lines covering the city. This enabled me to quickly transport myself to and from the interesting districts, not losing too much time in transport. During my short stay I managed to visit many districts. From our base in Akasaka I visited Tokyo Midtown, Roppongi, Asakusa, Sumida, Ginza, Tskuiji, Harajuku, Shinjuki and Shibuya.
The centrally located Akasaka is a residential and commercial area and is famous for the Hie Shrine, a Shinto Shrine dating from 1478. From Akasaka it is walking distance to Tokyo Midtown, with the tallest commercial buildings in the city, and the Roppongi district, well known for it’s sprawling night-life. In the northern located Asakusa district lies the Sensō-ji, an ancient Buddhist temple and Tokyo’s oldest and most significant temple. In neighbouring Sumida stands the Tokyo Skytree, a broadcasting, restaurant and observation tower. With its 634 meter it is the next tallest structure in the world.
Ginza is a popular upscale shopping area in Tokyo, with numerous internationally renowned department stores, boutiques, restaurants and coffeehouses. It is considered one of the most expensive, elegant and luxury streets in the world. Close by is the Tskuiji fish market, which is worth a visit during the early hours of a working day to have sushi for breakfast, as I did. Another popular shopping area is Harajuku, with Takeshita Street and Cat Street, and is considered the Japanese youth culture and fashion district.
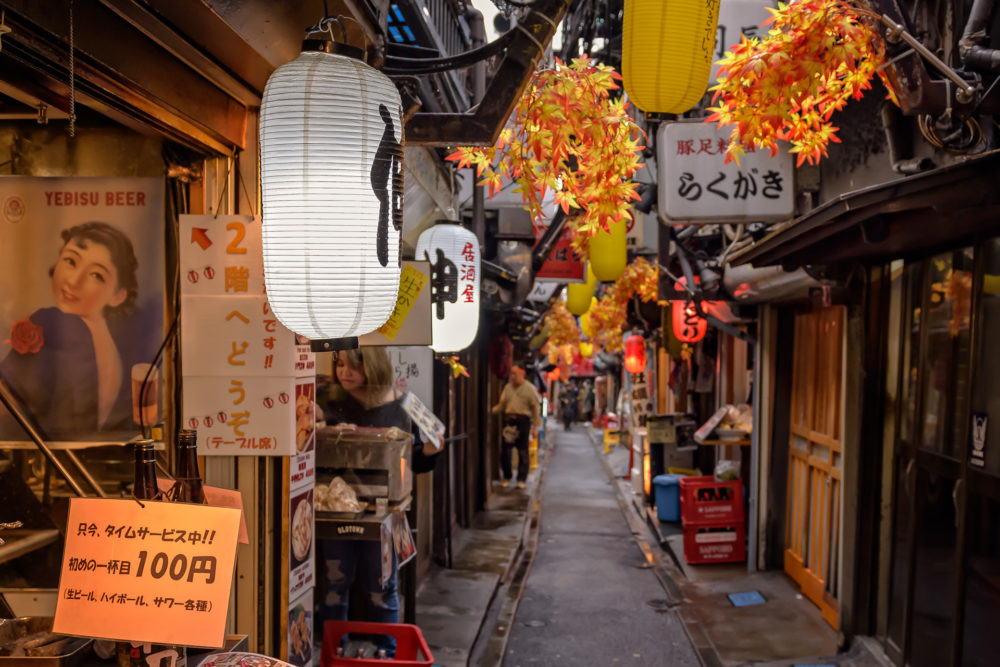
Shinjuku is a major commercial and administrative centre, housing the busiest railway station in the world (Shinjuku Station) which is crawling of people most of the day. Just north of Shinjuku Station you will find Piss Alley, a tight pedestrian street with many very small restaurants who can host only a few guests at a time. Although its name is not appealing, the food is fantastic! South of Shinjuku is Shibuya, another busy shopping and night-life district, and is most famous for the Shibuya Crossing. This large intersection stops all traffic to let pedestrians cross in any direction at the same time for approximately one minute. The Shibuya Crossing is often featured in movies, such as Lost In Translation and The Fast and the Furious: Tokyo Drift.
Enough with the words! A selection of 32 photos can temporarily be viewed on the Tokyo, Japan featured project page.
by René Timmermans | May 13, 2017 | Photography
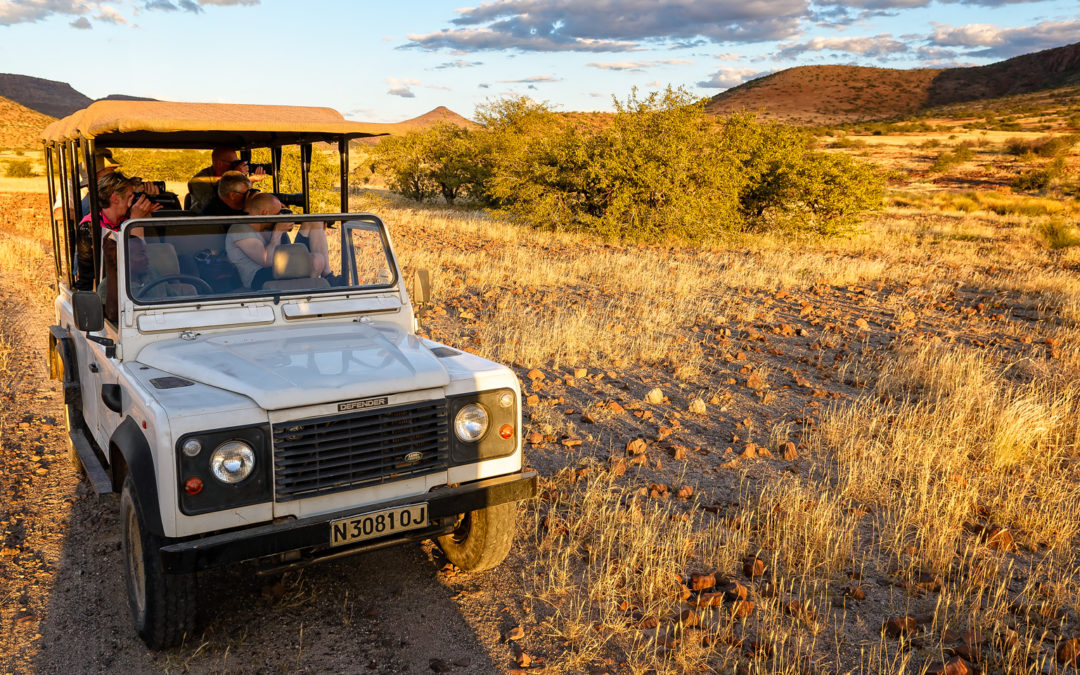
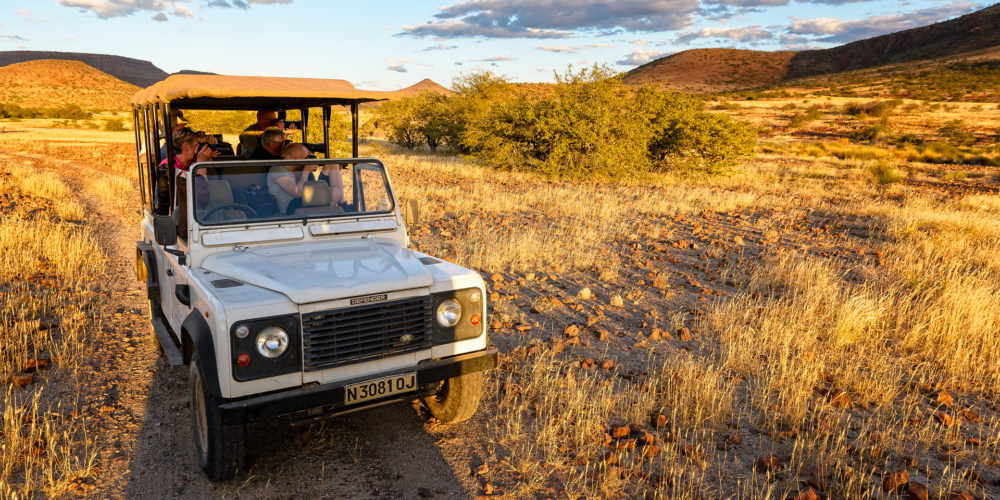
At the end of April I traveled for two weeks through Namibia in the southwest of Africa. This former German colony has a wide variety of wildlife and scenery to offer and some very unique landscapes. Namibia is twice the size of Sweden and slightly more than half of the size of Alaska. The country has only 2.5 million inhabitants, of which 325 thousand live in the capital Windhoek, in the center of the country.
The trip, specifically for photo-enthusiasts, was organized by Fotoresor i Fokus in cooperation with Aktiv Resor, a Stockholm based travel agency specialized in organizing active and adventurous holidays. Our tour guides, Elisabeth Landberger and Martin Agfors, are photo-professionals who offered a combination of energetic creativity and deep technological knowledge of anything photography.
The itinerary
From Windhoek we traveled north to the Etosha National Park, where we spent a few days spotting wildlife. From Etosha we traveled west to Damaraland and visited a Himba tribe village. We stayed in the Etendeka Mountain Camp, an eco-friendly luxury campsite that comes with the highest recommendations. It offers great home-made food and fantastic scenery all around.
From Damaraland we went onwards to the coast and visited the second largest city in the country, Swakopmund. This spacious and quiet city gives easy access to Walvis Bay, where tours for dolphin, seal and pelican spotting are organized.
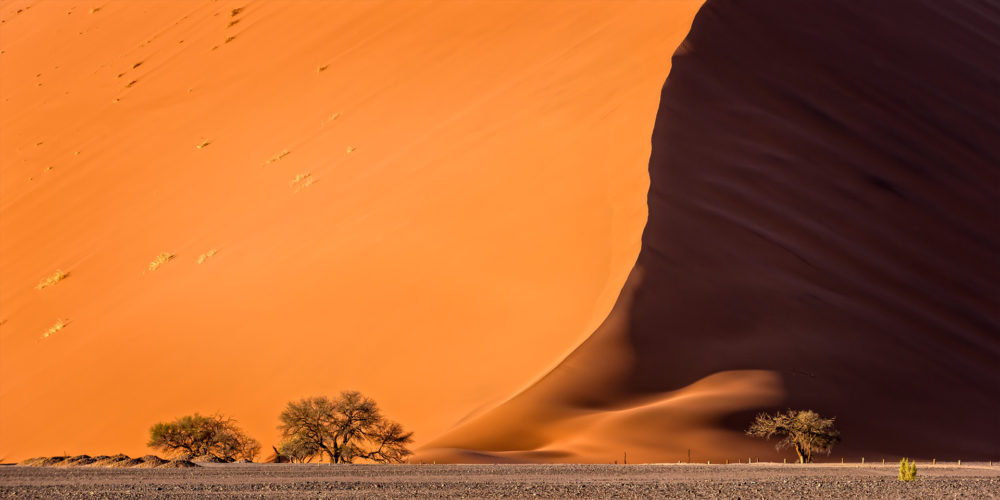
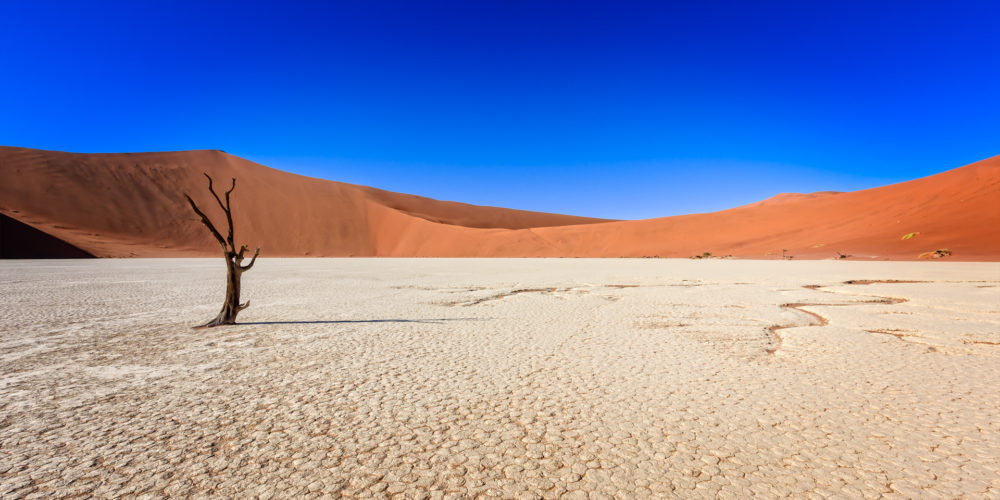
Our last stop before returning to Windhoek was, for me, the highlight of the journey, a visit to the south of the Namib Desert, Sossusvlei and Deadvlei. Both areas offer unique landscapes of endless sand dunes that reach a stunning 300-400 meters in height and clay pans with dead camel thorn trees (Vachellia Erioloba). A true photographers paradise!
A wider selection of my photos can temporarily be viewed on the Namibia featured project page. A smaller selection will eventually be published in the Gallery section.
by René Timmermans | Apr 7, 2014 | Photography

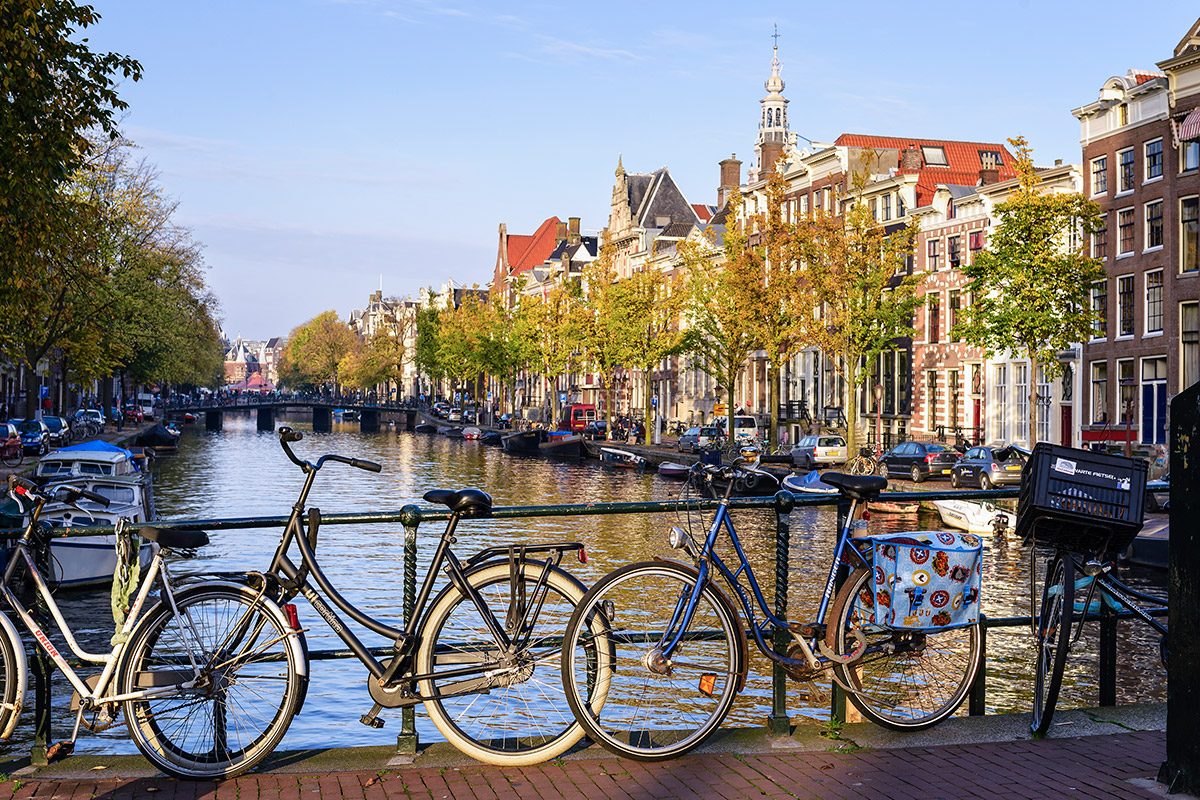
A new series of images has been added to the gallery list featuring the canals of Amsterdam in Holland (the Nehterlands). Click the image above or one of the links to view the new gallery.
Amsterdam, capital of the Netherlands, has more than one hundred kilometres of canals, about 90 islands and 1,500 bridges.
The three main canals, Herengracht, Prinsengracht, and Keizersgracht, dug in the 17th century during the Dutch Golden Age, form concentric belts around the city, known as the Grachtengordel. Alongside the main canals are 1550 monumental buildings.
The 17th-century canal ring area, including the Prinsengracht, Keizersgracht, Herengracht and Jordaan, were placed on the UNESCO World Heritage List in 2010.
by René Timmermans | Jan 14, 2013 | Photography
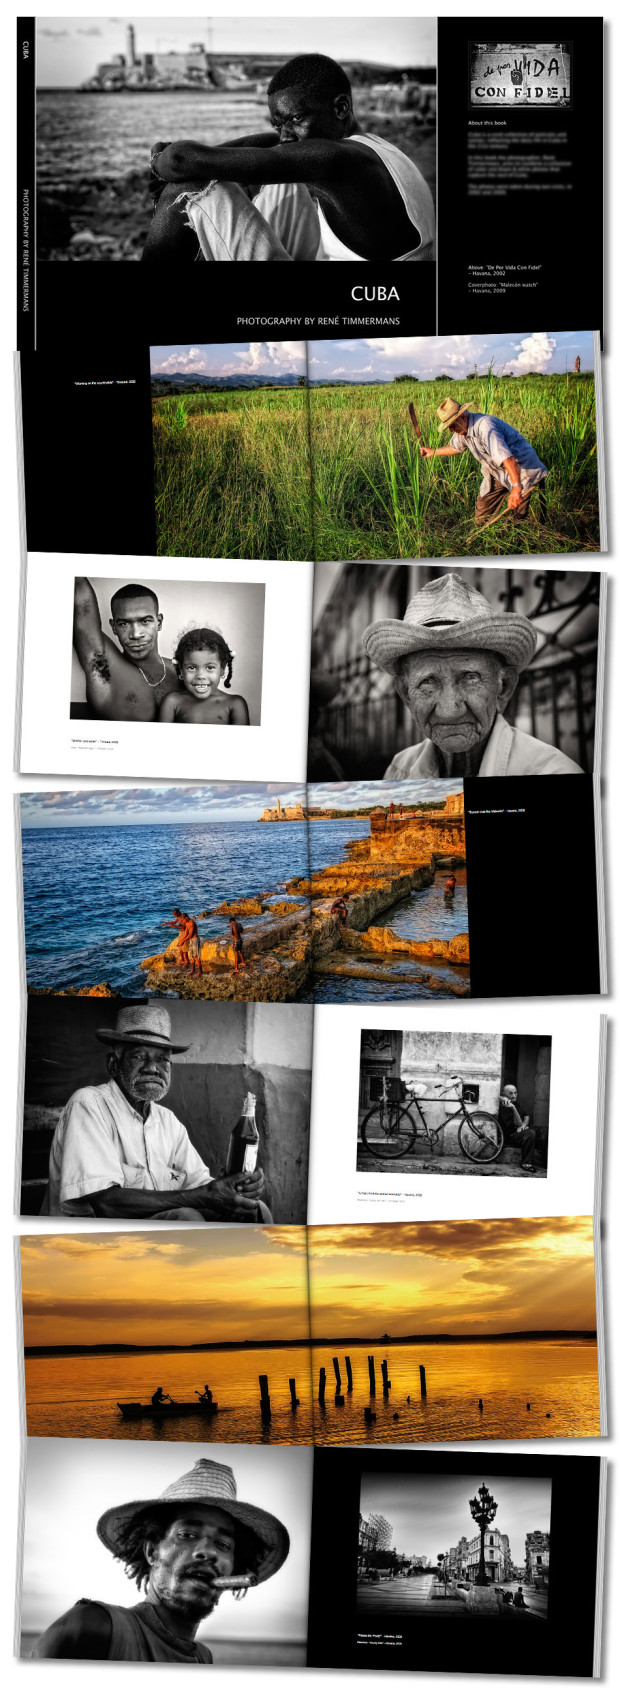
I am thrilled today! The proof copy of my first photography book is of to the printers this week.
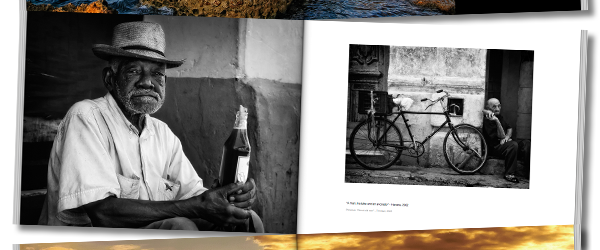
The book is showing a selection of my Cuba photos, including some never before published images. It has been on my to-do list for a long time, but I never got around to finish it, until now that is!
Below is a preview of some of the pages of the book.
by René Timmermans | Nov 27, 2012 | Photography
Although HDR photography has increased in popularity over the last few years, it is still very much a debatable technique. You either love it or you hate it.
Honestly, I have not been a big fan myself until recently. Very often I regard the final results to be overdone, surreal and even fake. I still feel that about a large number of HDR photos I see on the web.
However, after having viewed the works of Trey Ratcliff, Rafael “RC” Concepcion and Brian Matiash I have started to appreciate the technique more and more. I have come to understand that the HDR technique is a powerful technique to edit and enhance images without having to go over the top.
How to prepare for an HDR photo
If you view the various tutorials from Trey or RC you will see there are a few rules to prepare for a proper HDR photo to gain the best results:
- Take a series of photos in various exposures (bracketing);
- Use a tripod and a cable release to get ultra sharp images;
- Shoot in aperture priority mode to maintain same depth of field;
- Use a low ISO value to reduce the amount of noise;
- etc…
I have tried all of the above recommendations and it certainly results in an excellent baseline to start creating your HDR photo. However, we are not always in a situation we can use tripods or we simply did not shoot multiple exposures. How can we make the best out of creating an HDR photo without all that?
It is time to compromise
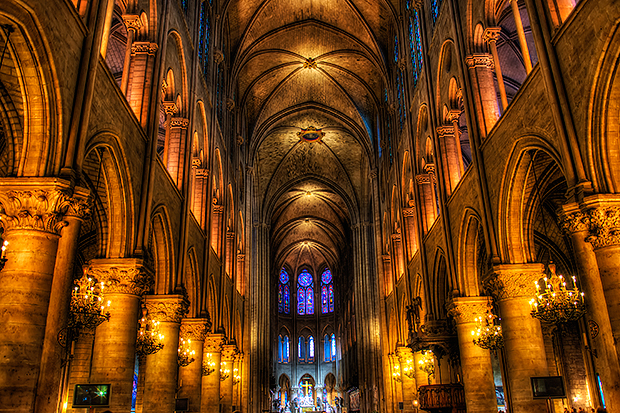
A few weeks ago I was in Paris and I visited the Notre Dame church. It is a beautiful spacious church with massive stone walls and a lot of decorative elements. Ideal for an HDR photo!
You are not allowed to use a tripod or flash inside the Notre Dame. The available light is very low, which makes it close to impossible to make a hand-held shot with some decent sharpness without sky rocketing the ISO to 6400 or above. I still wanted to create an as-good-as-possible photo, so I had to compromise.
The below photo was shot hand-held with a wooden divider wall as a stabilizer at 1/6 sec with f/2.8 on ISO 800.

Click the image to view a larger version.
Obviously I would have preferred to have a longer shutter time, a larger aperture value and a lower ISO value whilst shooting on a tripod. The distance from me to the entire scene was large enough to get away with an aperture of f/2.8 to gain maximum light on the sensor with maintaining sharpness from front to end. The slightly higher ISO value of 800 gave me eventually a shutter time of 1/6 sec which was short enough to make the shot hand-held with the stabilizing help of the wooden divider wall. Creating multiple exposures would have given me unaligned images which never align up very well with maintained sharpness is my experience, so I needed to work with the single image I shot.
Creating an HDR photo from a single exposure image
With the image open in Adobe Camera Raw I edited the image as I would do with any other, with exception of the exposure slider. When all the adjustments had been made I saved seven .tif copies of the image with different exposures, ranging from -3 to +3, from very dark to very bright.

Adjusting the exposure slider in Adobe Camera Raw to create multiple files
In this way you basically create your own series of multiple exposures. Remember that the best result is received if you shoot in RAW to have maximum flexibility. Here are the output examples:
I than opened all seven images in Photomatix Pro to do the tone-mapping. You can also use any other HDR software, such as Adobe’s own HDR Pro or Nik Software’s HDR Efex Pro 2. Be ware though that every program creates its own style of HDR. For this photo I liked Photomatix Pro the best.
For the rest you apply the normal work-flow as with any other HDR photo. You tweak the various sliders in the HDR software until you get the desired result, than save your file and, if necessary, further enhance the image in photo editing software.
For this image I used Adobe Photoshop to crop, make adjustments to the curves and brightness/contrast, applied some additional effects using Nik Software’s Color Efex Pro and finally added some sharpness.
Is this photo the perfect HDR photo? Definitely not! But is the best I could get out of the circumstances and create an HDR photo from a single exposure image.
Further reading
If you want to read more about HDR photography I can really recommend the video tutorials from Trey Ratcliff or “The HDR Book” by Rafael “RC” Concepcion. Have fun!


Recent Comments