by René Timmermans | Nov 27, 2012 | Photography
Although HDR photography has increased in popularity over the last few years, it is still very much a debatable technique. You either love it or you hate it.
Honestly, I have not been a big fan myself until recently. Very often I regard the final results to be overdone, surreal and even fake. I still feel that about a large number of HDR photos I see on the web.
However, after having viewed the works of Trey Ratcliff, Rafael “RC” Concepcion and Brian Matiash I have started to appreciate the technique more and more. I have come to understand that the HDR technique is a powerful technique to edit and enhance images without having to go over the top.
How to prepare for an HDR photo
If you view the various tutorials from Trey or RC you will see there are a few rules to prepare for a proper HDR photo to gain the best results:
- Take a series of photos in various exposures (bracketing);
- Use a tripod and a cable release to get ultra sharp images;
- Shoot in aperture priority mode to maintain same depth of field;
- Use a low ISO value to reduce the amount of noise;
- etc…
I have tried all of the above recommendations and it certainly results in an excellent baseline to start creating your HDR photo. However, we are not always in a situation we can use tripods or we simply did not shoot multiple exposures. How can we make the best out of creating an HDR photo without all that?
It is time to compromise
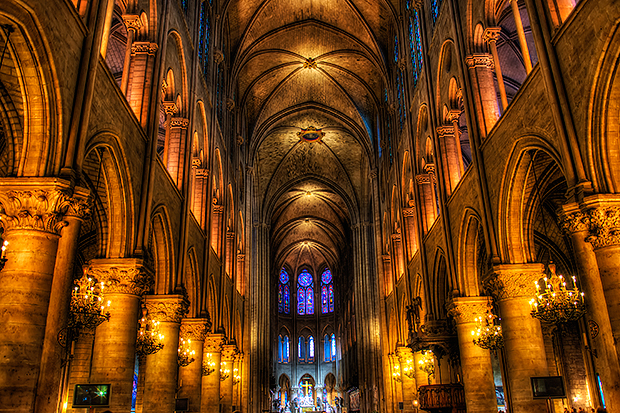
A few weeks ago I was in Paris and I visited the Notre Dame church. It is a beautiful spacious church with massive stone walls and a lot of decorative elements. Ideal for an HDR photo!
You are not allowed to use a tripod or flash inside the Notre Dame. The available light is very low, which makes it close to impossible to make a hand-held shot with some decent sharpness without sky rocketing the ISO to 6400 or above. I still wanted to create an as-good-as-possible photo, so I had to compromise.
The below photo was shot hand-held with a wooden divider wall as a stabilizer at 1/6 sec with f/2.8 on ISO 800.

Click the image to view a larger version.
Obviously I would have preferred to have a longer shutter time, a larger aperture value and a lower ISO value whilst shooting on a tripod. The distance from me to the entire scene was large enough to get away with an aperture of f/2.8 to gain maximum light on the sensor with maintaining sharpness from front to end. The slightly higher ISO value of 800 gave me eventually a shutter time of 1/6 sec which was short enough to make the shot hand-held with the stabilizing help of the wooden divider wall. Creating multiple exposures would have given me unaligned images which never align up very well with maintained sharpness is my experience, so I needed to work with the single image I shot.
Creating an HDR photo from a single exposure image
With the image open in Adobe Camera Raw I edited the image as I would do with any other, with exception of the exposure slider. When all the adjustments had been made I saved seven .tif copies of the image with different exposures, ranging from -3 to +3, from very dark to very bright.

Adjusting the exposure slider in Adobe Camera Raw to create multiple files
In this way you basically create your own series of multiple exposures. Remember that the best result is received if you shoot in RAW to have maximum flexibility. Here are the output examples:
I than opened all seven images in Photomatix Pro to do the tone-mapping. You can also use any other HDR software, such as Adobe’s own HDR Pro or Nik Software’s HDR Efex Pro 2. Be ware though that every program creates its own style of HDR. For this photo I liked Photomatix Pro the best.
For the rest you apply the normal work-flow as with any other HDR photo. You tweak the various sliders in the HDR software until you get the desired result, than save your file and, if necessary, further enhance the image in photo editing software.
For this image I used Adobe Photoshop to crop, make adjustments to the curves and brightness/contrast, applied some additional effects using Nik Software’s Color Efex Pro and finally added some sharpness.
Is this photo the perfect HDR photo? Definitely not! But is the best I could get out of the circumstances and create an HDR photo from a single exposure image.
Further reading
If you want to read more about HDR photography I can really recommend the video tutorials from Trey Ratcliff or “The HDR Book” by Rafael “RC” Concepcion. Have fun!
by René Timmermans | Oct 15, 2012 | Photography

Last weekend it was time again for Scott Kelby’s Worldwide Photo Walk. On Saturday, October 13th 2012, it was the fifth time the walk was organized and the second time I participated. This time we had a fully booked group with 50 photographers joining our Stockholm walk. On the image above you see our walk-leader, Max Gennel, giving final instructions to the group before we kick-off our walk.
The route of the Stockholm walk.
Our walk led us through Vasastan towards and over Barnhus-bridge. We continued alongside the water, parallel Kungholmsstrand, on the north side of Kungsholmen all the way towards Ekelunds-bridge. From that point we walked over Karlbergsstrand into Vasastan again.

It was a rich walk with wonderful views over the city, beautiful sights over the water and plenty of autumn colored nature to photograph. After the walk we met up in a cozy restaurant, Oljebaren, and enjoyed a well deserved lunch.
Also this year it was great to meet and catch up with so many fellow photographers. A big thank you to our walkleader for a very well organized photo walk!
A few of my photos.
Below is a selection of the photos I shot during the walk:

Above: A panorama photo from Karlberg Palace. I stitched six photos together in Adobe Photoshop to create this panorama. The photo can also be viewed on the Panorama portfolio page. (click the image to enlarge)

Above: This is an HDR photo generated from three different exposures. (click the image to enlarge)

Above: Under Barnhus-bridge. (click the image to enlarge)

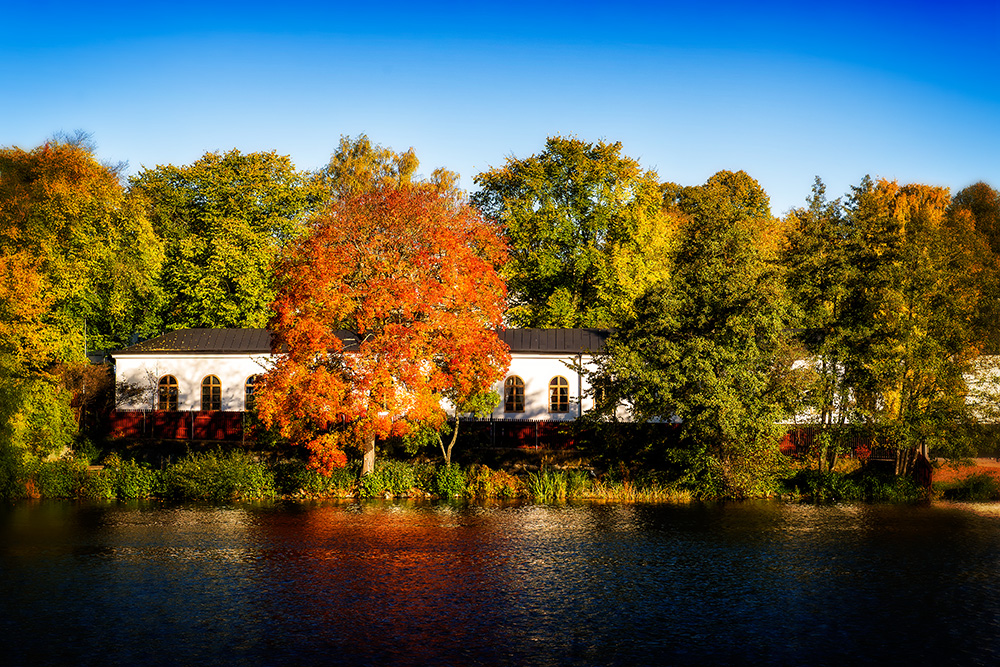
Above: One of the buildings of Karlberg Palace in autumn colors. (click the image to enlarge)

Above: Autumn is in full swing. (click the image to enlarge)

Above: Contrasting colors in this close-up photo of a flower. I just had a bit of fun with this one trying to create a strong graphical image with bright colors. (click the image to enlarge)
by René Timmermans | Oct 8, 2012 | Photography

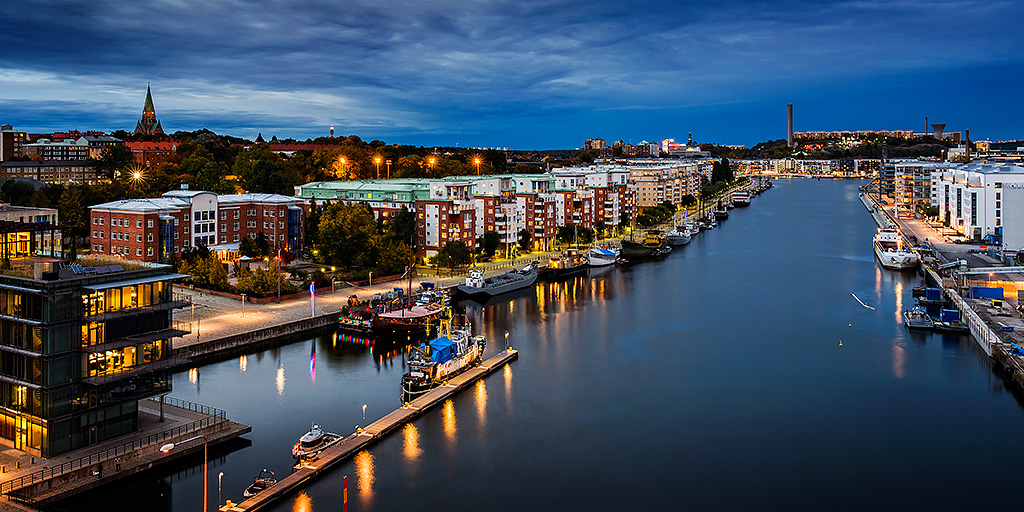
A new panorama photo has been added to the featured gallery “Panorama”. Click the image above to view the large version.
The photo was taken from Skanstulls bridge in southern Stockholm and shows Hammarby canal. The left side of the photo is overlooking south-east Södermalm with the Sofia Church as its highest point. On the right side of the photo a small part of northern Hammarbysjöstad is visible.
A Nikon D600 with a 24-70mm lens was used to shoot multiple images, which were stitched together in Adobe Photoshop.
by René Timmermans | Aug 14, 2012 | Photography

Click the image to enlarge.
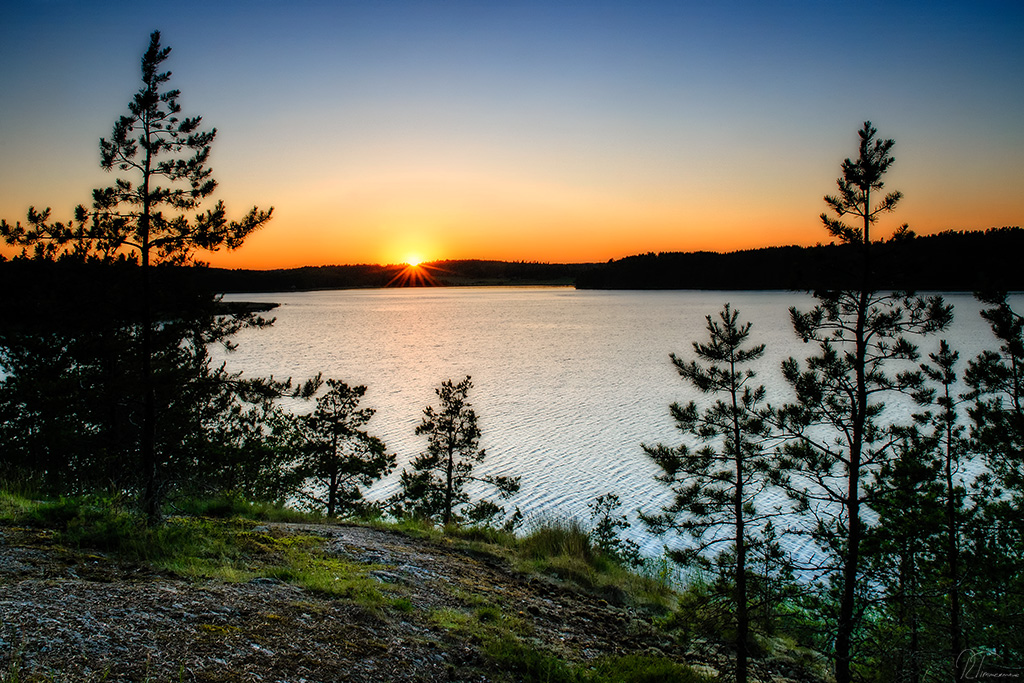
A re-worked version from one of my favorite sunset images.
by René Timmermans | Jul 30, 2012 | Photography

Click the image to enlarge.
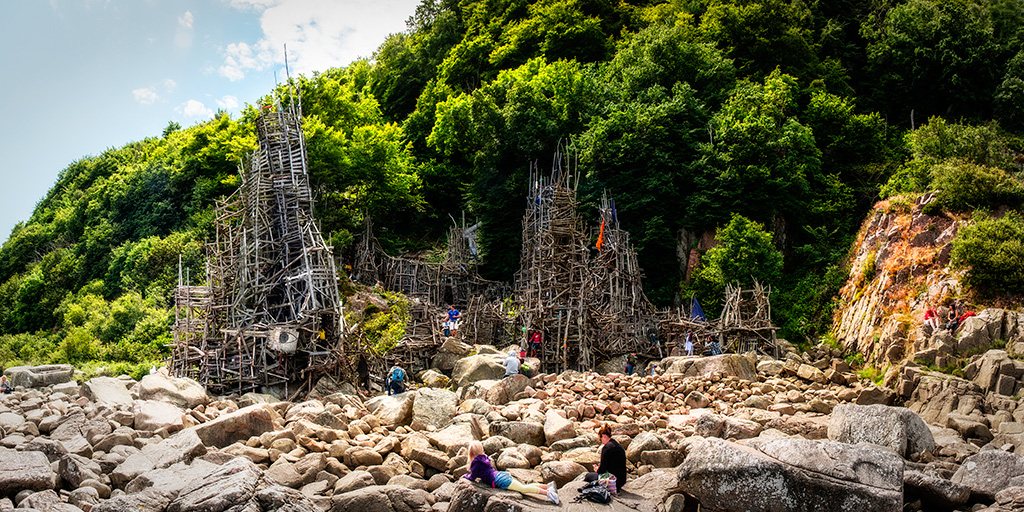
In July we have been on sight-seeing in Skåne, the most southern province of Sweden. One day we visited the natural reserve Kullaberg in north-west Skåne. This is the area where the sculpture Nimis is build.
Nimis, which is Latin for “too much”, is a series of wooden sculptures constructed by artist Professor Lars Vilks. They are a massive, wooden labyrinthine structure connected by several wooden towers. The structure consist of 75 tonnes of driftwood the artist has found on the coastline.
Lars Vilks started to build Nimis in 1980 and it has been the subject of a long-running legal dispute between the Swedish authorities and the artist. As no permission was given to build on the site within the nature reserve, the County Administrative Board in Skåne has sought to have Nimis demolished, despite the fact that it has become a popular tourist attraction.

As Nimis’ existence is not sanctioned by the state, it is difficult to find – there are no official sign posts, nor is it marked on maps. It lies a few kilometers northwest of the town of Arild and somewhat farther from the town of Mölle, and can only be reached on foot following a well-worn path with yellow “N”s painted on trees and fences. The path begins as an easy stroll past Himmelstorp, a well-preserved eighteenth-century farmstead, but quickly becomes a steep and rocky climb down to the coast.

by René Timmermans | Jun 7, 2012 | Photography

Click the image to enlarge.
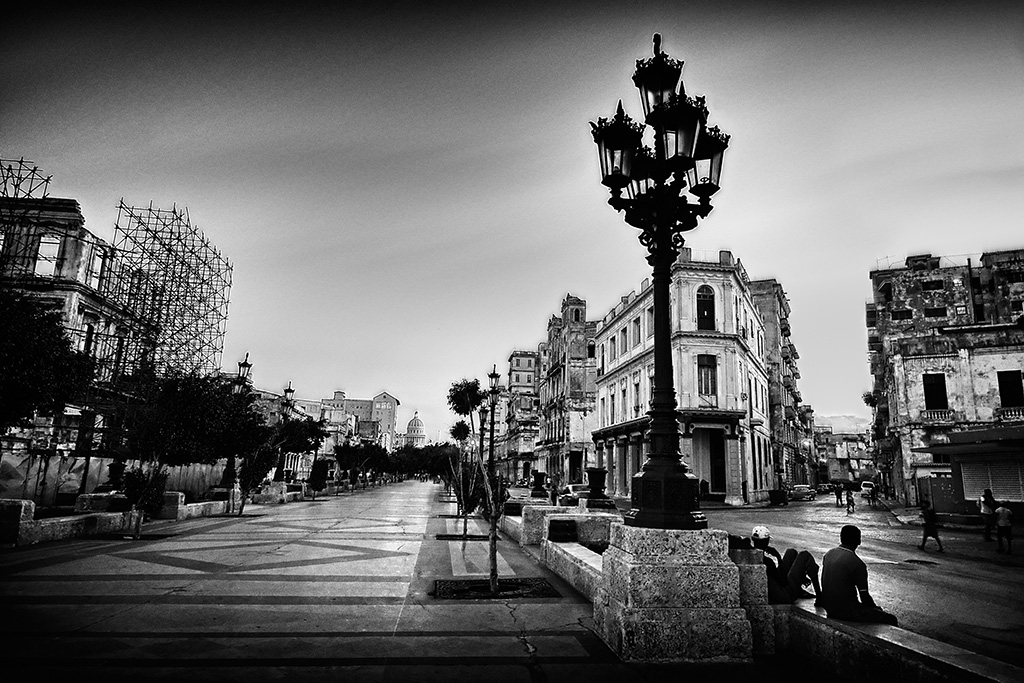
Paseo del Prado is a main street in Havana, Cuba. It is the dividing line between Centro Habana and Old Havana.
In 1772, French landscape architect Jean-Claude Nicolas Forestier designed the paseo, lined with trees and with marble benches.
Lining the boulevard are important buildings such as hotels, cinemas, theaters, and mansions imitating styles from Madrid, Paris and Vienna. El Prado was the first paved street in Havana.


Recent Comments